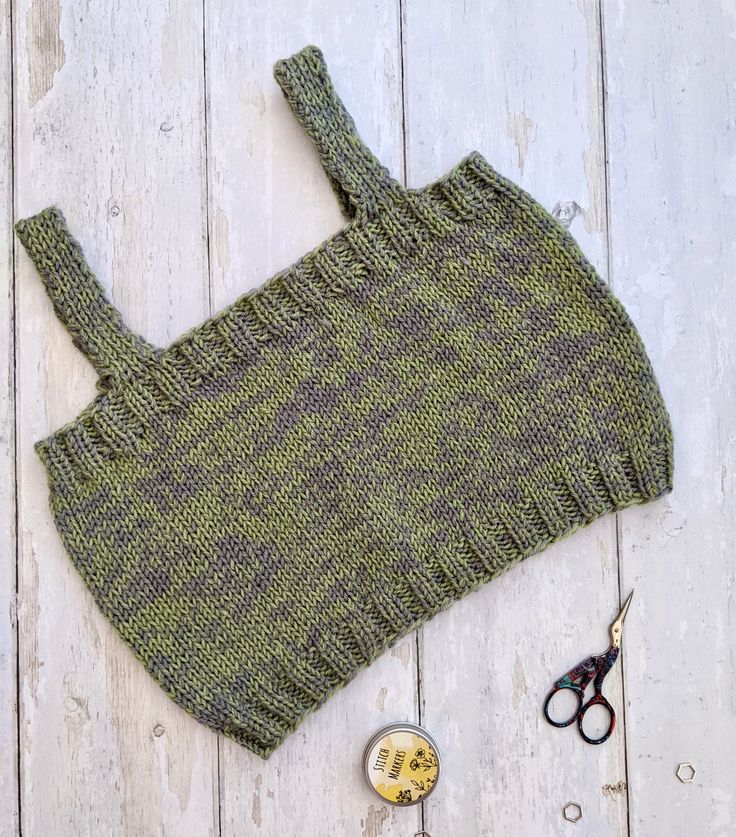
Knitted Stash-Busting Tube Top
Hey there! The Knitted Stash-Busting Tube Top is a fabulous project for using up those odds and ends of yarn you have lying around. Not only is this project fun and creative, but it’s also a fantastic way to reduce waste by reusing what you already have. Whether you’re a beginner or experienced knitter, this tube top is a great way to add a pop of color and uniqueness to your wardrobe. So grab your needles, gather your yarn scraps, and have a blast creating your very own customized Knitted Stash-Busting Tube Top!
Sizes:
A (B, C, D, E) (F, G, H)
To fit bust sizes:
26-30” (31-35”, 35-39”, 40-44”, 45-49”) (50-54”, 55-60”, 60-64”)
64-76cm (78-88cm, 90-100cm, 102-114cm, 116-126cm) (128-138cm, 140-152cm, 154-164cm)
Yarn:
Two strands of 4ply weight or a single strand of a aran weight, sample knitted in Hobbii Unicorn Solid in ‘green tea’ & ‘grey’ (400m / 100g)
Get creative and use as many of your sock weight scraps as you can!
The given yardage the total for both strands held together:
70g (80g, 90g, 100g, 120g) (130g, 140g, 150g)
280m (320m, 370m, 420m, 470m) (520m, 570m, 620m)
300y (350y, 400y, 450y, 500y) (570y, 620y, 670y)
Consider that extra yardage will be required if the body length is increased.
Note that in general this stretch design works better in yarns that have some stretch, cotton may be more challenging, and you may need to play with the fit a little to get it perfect for you.
Needles:
5 & 5.5mm circular needles and/or DPNs
Needle sizes are recommended, choose a size needed to achieve gauge, the smaller needle should be 0.5mm smaller than the larger needle
Gauge:
Unstretched: 18 stiches per 4” / 10cm on larger needles in stockinette
Stretched: 14 stiches per 4” / 10cm on larger needles in stockinette
Row gauge is not important
‘Stretched’ is not as stretched as possible but rather to a degree of stretching that you would approximately like in the final piece.
Choosing your size and fit:
The stated measurements are for a range of bust sizes that will fit in each size. Note that if you are at the lower range of the size the fit will be looser than at the highest end of the range. Use the sizing chart on page 4 for more information.
The pattern is designed for a cropped length, if you wish to make the body longer, continue working the main body before casting off the back.
Trying on the garment as you go will help you to get a perfect fit, the stated length measurements are just a guideline. Also remember that it will shrink in length when you stretch it out, so the length of your knitted piece will not be the length when you are wearing it.
Stash Busting Tube Top
Sizes will be written in the following order throughout the pattern:
A (B, C, D, E) (F, G, H)
Body:
With smaller needles loosely or with a stretchy cast on technique, CO 100 (116, 132, 152, 168) (184, 204, 220) stitches and join to work in the round, place a BOR marker.
k2 p2 ribbing for 1.5” / 4cm
Change to larger needles.
Knit all stitches in the round until your piece measures 7.5” / 20cm from the cast on edge or to your desired length.
Note: Consider that any extra length here will increase yardage.
Change to smaller needles.
k2 p2 ribbing for 1.5” / 4cm
In the final round place the following removable markers to help you place the straps later:
* Place marker, k9, place marker, k 16 (20, 24, 29, 33) (37, 42, 46) * repeat to end of round.
Cast off all stitches with a standard cast off technique while keeping the removable markers in place.
Note: If you are knitting with a lot of negative ease you may need to use a stretchy cast off and vice versa if you are knitting with positive ease consider casting off with a smaller needle size.
Straps:
With smaller needles and the RS facing you, pick up 9 stitches between one of the pairs of markers.
RS rows: k1 *p1, k1* repeat to end of row, turn
WS rows: p1 *k1, p1* repeat to end of row, turn
Repeat the above 2 rows until your strap reaches the desired length, remember it will stretch!
Cast off all stitches and attach sew the strap to the opposing side between another set of markers.
Repeat the instructions above for the second strap.
Weave in ends and block.