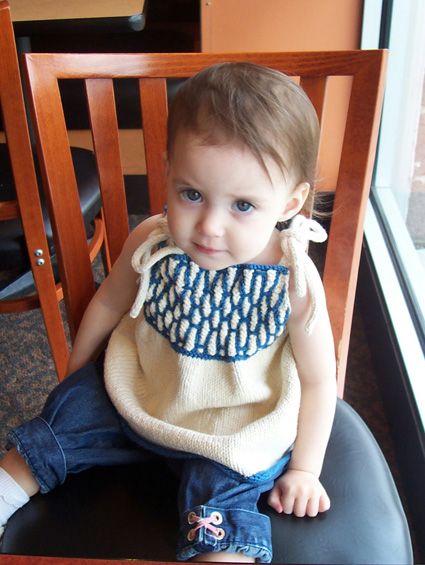
Knitted Baby Top
Looking for an adorable outfit for your little one? A knitted baby top is the perfect choice! Not only is it cute and cozy, but it also adds a touch of charm to any baby's wardrobe. The soft texture of the knitted fabric will keep your baby warm and comfortable throughout the day. Whether you're heading out for a stroll in the park or having a cozy day at home, a knitted baby top is a versatile and stylish option that will surely make your baby look even more precious.
SIZE
Children’s 2[4, 6, 8] (shown in size 2)
FINISHED MEASUREMENTS
Measurements are given for garment after washing and smocking, without cinching.
- Chest: 21[23, 25, 27] inches
- Lower edge: 32[34, 36, 38] inches
- Length (not including ties): 11.5[13, 14.5, 17] inches
MATERIALS
- Rowan Denim [100% cotton; 101 yd per 50g skein]
- [MC] #324 Ecru; 5[7, 8, 9] skeins
- [CC] #231 Tennessee; 1[1, 2, 2] skeins
- 1 set US #5/3.75mm double-point needles
- 1 US #5/3.75mm circular needle, 16- or 24-inch length
- Tapestry needle
GAUGE
After washing: 20 sts/32 rows = 4 inches in stockinette stitch
Note: Fabric knit using denim yarn will shrink lengthwise when washed.
PATTERN NOTES
Bodice Pattern (Worked over a multiple of 3 sts + 1):
- Set-up Row [RS]: K1 using CC, [k2 using MC, k1 using CC] to end.
- Row 1 [WS]: P1 using CC, [k2 using MC, p1 using CC] to end.
- Row 2 [RS]: K1 using CC, [p2 using MC, k1 using CC] to end.
- Repeat Rows 1 and 2 for Bodice Pattern.
I-Cord
- K 1 row.
- Next Row: Instead of turning work around to work back on the WS, slide all sts to other end of needle, switch needle back to your left hand, bring yarn around back of work, and start knitting the sts again. I-Cord is worked with the RS facing at all times.
- Repeat this row to form I-cord. After a few rows, work will begin to form a tube.
PATTERN
BACK
Lower Body:
Using CC, CO 80[86, 92, 98] sts.
K 4 rows. Break CC.
Using MC, work in stockinette st, beginning with a RS row.
Continue in stockinette st until work measures 9[10.25, 11.5, 13.75] inches, ending with a WS row. Do not break MC.
Bodice:
Row 1 [RS]: Using CC, k3[6, 1, 4], k2tog, [k6, k2tog] 9[9, 11, 11] times, k3[6, 1, 4]. 70[76, 80, 86] sts.
Row 2 [WS]: K all sts.
Row 3 [RS]: Using MC, sl 1, k1, psso, k1[1, 3, 3], work Set-up Row of Bodice Pattern to last 3[3, 5, 5] sts, k1[1, 3, 3], k2tog.
Row 4 [WS]: Using MC, sl 1, k1, psso, k0[0, 2, 2], work Row 1 of Bodice Pattern to last 2[2, 4, 4] sts, k0[0, 2, 2], k2tog.
Note: From this point forward, maintain edge sts in MC.
Row 5 [RS]: Sl 1, work in pattern as set to last st, k last st using MC.
Row 6 [WS]: Using MC, sl 1, k1, psso, work in pattern to last 2 sts, k2tog using MC.
Repeat these 2 rows 11[13, 15, 18] times more. 42[44, 44, 44] sts.
Break MC.
Using CC, k 1 row.
BO all sts knitwise with WS facing.
FRONT
Work as for Back.
TIES
Using MC and double-point needle, CO 3 sts.
Work I-cord until piece measures 16[18, 20, 22] inches.
Break yarn, draw through all sts and pull tight.
Make 3 more ties in the same way.
FINISHING
First row is worked from left to right.
With RS of work facing and beginning with needle at WS of work, draw needle up through work at left edge of first column of CC sts, just below upper garter st border.
Bring needle across work to second column of CC sts, insert needle at right edge of CC st and draw through to WS of work.
Repeat steps 1 and 2, wrapping yarn around this set of 4 sts and pulling them together.
Move to next column of CC sts, and repeat steps 1-3.
Continue in this way until you have worked across the row.
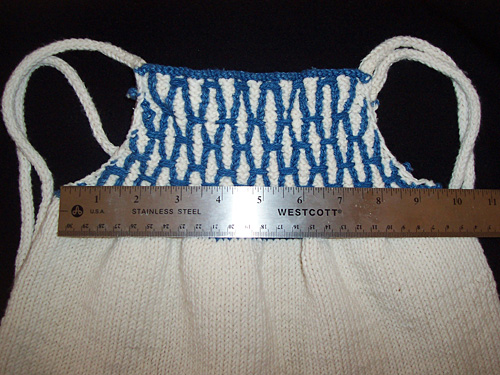
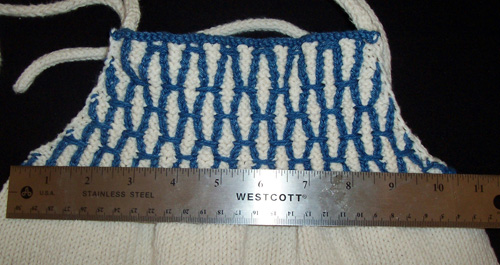
Count down 4 rows from first row of smocking, and work a second row, working from right to left. Wrap alternate pairs of CC stitches from those that were wrapped in first row (see photo).
Continue in this way until 6[7, 8, 9] rows of smocking have been worked.
Weave in all ends.
Machine wash and dry all pieces.
Sew back and front together along side edges of lower body, ending at lower edge of bodice. Sew ties to upper corners of bodice.
If the top is too loose, weave a length of yarn through each of the lines of smocking and cinch to create the desired size. Tie these lengths of yarn together in square knots at the side seams, leaving long tails. Weave in tails.
Later, when your child has grown larger, look for the square knots and unknot them (if possible), then loosen the top as desired. You may wish to keep some of the unused yarn handy for this purpose.