Knitted Felicity Blanket
The Knitted Felicity Blanket is the coziest companion for chilly evenings or lazy weekends, adding a touch of warmth and comfort to any room. Its intricate knit pattern and soft texture create a feeling of snuggly bliss, making it perfect for curling up with a good book or enjoying a movie night at home. Whether you're looking to add a pop of color to your living space or simply want to relax in style, this blanket is sure to become your new favorite go-to for relaxation and rejuvenation. So grab a cup of tea, wrap yourself up in the Knitted Felicity Blanket, and bask in its delightful coziness.
Skill Level: Easy
Gauge
- Gauge is not important for this project as it’s written to be worked with any weight of yarn. I’ve included mine for reference.
- 12 sts and 17 rows of stockinette stitch in the round and after blocking is 4″ x 4″ (10x10cm)
Finished Measurements
50” (127cm) square, after blocking
Note: Pattern is written to be worked with any weight of yarn and to any desired size. Your finished blanket will be square shaped and the same measurement on each side.
Materials
- 6 skeins Lion Brand Mandala Ombre in Felicity (held doubled)
OR
- Your choice of any weight of yarn (see Notes section)
- US Size 11/UK Size 0/8mm needles (DPNs and circular needles large enough for the size of your project, varying by desired size)
- Stitch markers (4 total, 1 different for BOR)
- Tapestry needle for weaving in ends
- Scissors
- Measuring tape or gauge swatch measuring device
- Blocking mats and pins (optional but highly recommended)
Notes
– This center out knit blanket pattern is designed to be worked with any weight of yarn. Whichever yarn you use, use the recommended knitting needle size for that yarn.
– You will repeat the 2 rows of the body until you reach your desired width/length (minus how much width you want for the border).
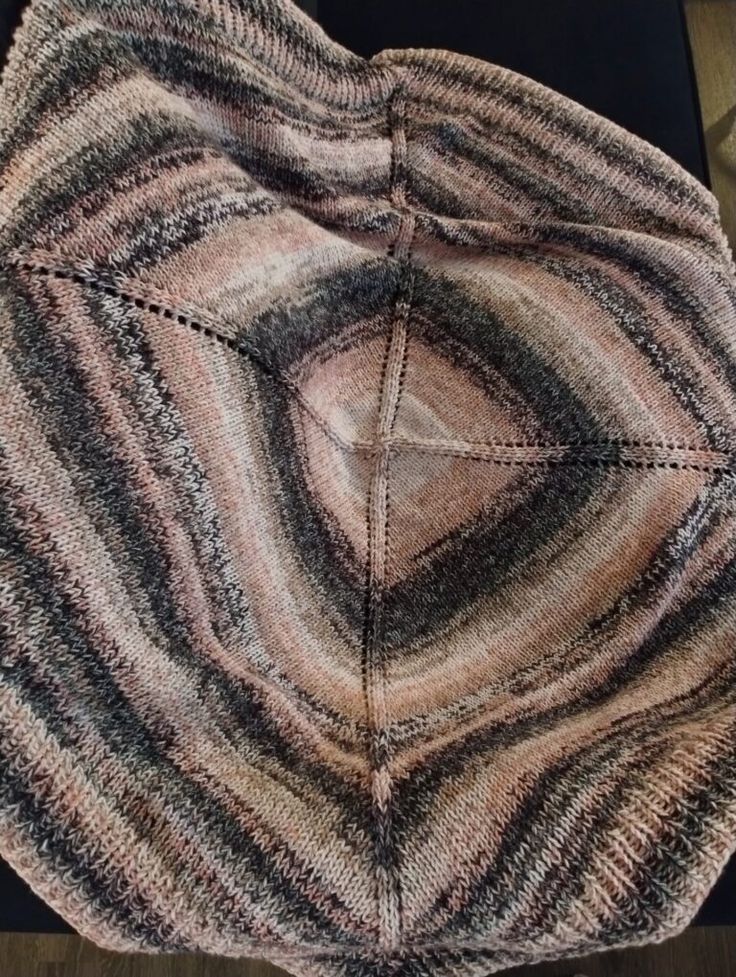
– Pattern instructions are written per the sample in the photos.
– * * indicates a repeat
– [ ] indicate
– (xx) at the end of a row/round indicates how many total stitches for that row/round
Stitch Index
- CO – cast on
- R – row/round
- BOR – beginning of row/round
- PM – place marker
- SM – slip marker
- BO – bind off
- YO – yarn over
- k – knit
- k1fb – knit 1 front and back (knit 1 through the front leg of the stitch, do not remove stitch from left needle, knit 1 through the back leg of the stitch, remove stitch from left needle [increase by 1 st])
- p – purl
- p1k1 – purl 1 front, knit 1 back (purl 1 in the front leg of the stitch, do not remove stitch from left needle, knit 1 through the back leg of the stitch, remove stitch from left needle [increase by 1 st])
Pattern
Foundation Using DPNs and the pinhole method, CO 8 (if you prefer to use the magic circle method, you’ll need to PM for BOR and PM every 2 sts and SM here and throughout)
R1 k each st around (8)
R2 *k1, yo, k1* 4 times (12)
R3 k each st around (12)
R4 *k1, yo, k1, yo, k1* 4 times (20)
R5 k each st around (20)
R6 *k1, yo, k3, yo, k1* 4 times (28)
R7 k each st around (28)
R8 *k1, yo, k5, yo, k1* 4 times (36)
R9 k each st around (36)
R10 *k1, yo, k to 1 st before marker, yo, k1* 4 times (inc by 8 sts each inc R)
R11 k each st around (same st count as previous R)
Repeat R10-11 until you reach your desired width/length minus the border. I had 105 sts on each side (420 sts total) when I started the border. Switch to a longer cord as needed to hold all your sts as it grows.
Border (row count will start back at 1 for easy counting)
R1 [k1fb, *k1, p1* until 1 st before marker, p1k1, SM] 4 times (428)
R2 [k1, *p1, k1* to marker, SM] 4 times (428)
R3 [p1k1, *p1, k1* until 1 st before marker, k1fb, SM] 4 times (436)
R4 [p1, *k1, p1* to marker, SM] 4 times (436)
Repeat R1-4, ending on R2 for 3.5” (8cm) or until you reach your desired border width.
Bind off in pattern using your preferred bind off method.
Finish off and weave in ends!
Blocking is optional but I highly recommend it to open up the corners and really show off the details.