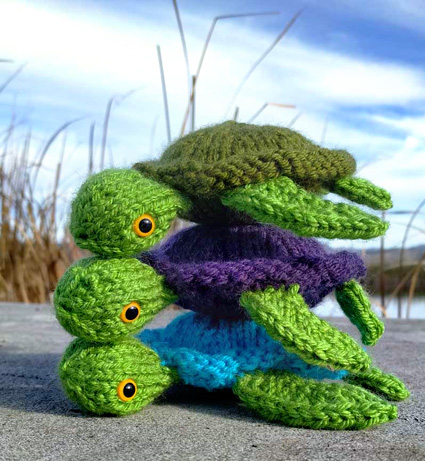
Knitted Sea Turtle Stack
The Knitted Sea Turtle Stack is a delightful and whimsical creation that brings together the charm of sea creatures with the cozy warmth of knitted designs. Each intricate stitch adds personality to these lovable turtles, making them a sweet addition to any home decor or a perfect gift for a sea life enthusiast. Their soft texture and fun colors are sure to bring smiles and a touch of playfulness to any room. Whether you're a knitting enthusiast or simply appreciate the beauty of handmade crafts, the Knitted Sea Turtle Stack is a wonderful choice that is as heartwarming as it is adorable.
SIZE
One
FINISHED MEASUREMENTS
Shell: 6 inches/15.25 cm
Length: 8 inches/20.25 cm from flipper to flipper
MATERIALS
Yarn
Knitpicks Wool of the Andes Worsted [100% Peruvian Highland Wool; 110yd/100m per 50g skein];
spacer [MC] Jalapeno; 1 skein
spacer [CC1] Calypso Heather; 1 skein
spacer [CC2] Evergreen; 1 skein
spacer [CC3] Blackberry; 1 skein
Note: Each turtle uses about 25 yds of the MC and about 40 yds of the CC, so this pattern works well with partial skeins.
Recommended needle size
[always use a needle size that gives you the gauge listed below - every knitter's gauge is unique]
spacer US #5/3.75mm needles for small circumference in the round – DPNs, 1 long or two short circulars
Notions
spacer six 9mm animal safety eyes in orange (two eyes per turtle)
spacer yarn needle
spacer polyester fiberfill
spacer pins
GAUGE
20 sts/24 rounds = 4 inches/10 cm in stockinette stitch
Note: gauge is not crucial as long as you like the fabric that results. Typically, for a stuffed toy, you’d work a little tighter than usual for a yarn, to ensure the stuffing doesn’t show through or come out. Working at a different gauge will change finished size, and yarn usage.
For Head, Flippers and Tail, there’s a relatively small number of stitches. If you’re using DPNs, and find it easier, you can indulge in a little cheat: distribute the stitches across two DPNs, and work with a third. This technique can create ladders, but in this context it won’t matter.
Work one Shell in each of the three CC colors; for each, the rest of the turtle is worked in MC.
DIRECTIONS
Shell Top
The shell top is worked from the outer edges toward center.
CO 54 stitches in a CC. Distribute sts across needles as you prefer and join for working in the round.
Rounds 1-4: P.
Round 5: K.
Round 6: (K2tog, k4) around. 45 stitches.
Round 7-8: K.
Round 9: (K2tog, k3) around. 36 stitches.
Round 10-11: K.
Round 12: (K2tog, k2) around. 27 stitches.
Round 13: K.
Round 14: (K2tog, k1) around. 18 stitches.
Round 15: K.
Round 16: (K2tog, k1) around. 12 stitches.
Round 17: (K2tog) around. 6 stitches.
Break yarn and pull through stitches to fasten off.
SHELL BOTTOM
The ShellBottom is worked from the center to the outer edge. Make the shell bottom in the same color as the shell top.
CO 3 stitches in the same CC as shell top.
Row 1: Working as if for i-cord, pulling the yarn across the back, (Kfb) 3 times. 6 stitches.
Distribute sts across needles as you prefer and join for working in the round.
Round 2: K.
Round 3: (Kfb) around. 12 stitches.
Round 4: K.
Round 5: (Kfb, k1) around. 18 stitches.
Round 6: K.
Round 7: (Kfb, k1) around. 27 stitches.
Round 8: K.
Round 9: (Kfb, k2) around. 36 stitches.
Round 10: K.
Round 11: (Kfb, k3) around. 45 stitches.
Round 12: K.
Round 13: (Kfb, k4) around. 54 stitches.
Round 14: K.
BO, leaving 24-inch/60-cm tail for sewing.
HEAD
CO 12 stitches in MC, leaving long tail for sewing. Distribute sts across needles as you prefer and join for working in the round.
Round 1-2: K.
Round 3: (K1, kfb, k2, kfb, k1) twice. 16 stitches.
Round 4: K.
Round 5: (K2, kfb, k2, kfb, k2) twice. 20 stitches.
Rounds 6-9: K.
Round 10: (K2, k2tog, k2, k2tog, k2) twice. 16 stitches.
Round 11: K.
Round 12: (K1, k2tog, k2, k2tog, k1) twice. 12 stitches.
Round 13: (K2tog) around. 6 stitches.
Break yarn and pull through stitches to fasten off.
FRONT FLIPPER (Make 2)
CO 10 stitches in MC, leaving long tail for sewing. Distribute sts across needles as you prefer and join for working in the round.
Round 1: K.
Round 2: Ssk, k2, m1L, k2, m1L, k2, k2tog.
Repeat Rounds 1-2 three more times.
Round 9: K.
Round 10: Ssk, ssk, m1L, k2, m1L, k2tog, k2tog. 8 stitches.
Round 11: K.
Round 12: Ssk, k4, k2tog. 6 stitches.
Round 13: K.
Round 14: Ssk, k2, k2tog. 4 stitches.
Break yarn and pull through stitches to fasten off.
BACK FLIPPER (Make 2)
CO 8 stitches in MC, leaving long tail for sewing. Distribute sts across needles as you prefer and join for working in the round.
Rounds 1-4: K.
Round 5: Ssk, k4, k2tog. 6 stitches.
Round 6: K.
Round 7: Ssk, k2, k2tog. 4 stitches.
Break yarn and pull through stitches to fasten off.
TAIL
CO 6 stitches in MC, leaving long tail for sewing. Work as per i-cord, pulling yarn across the back.
Rounds 1-2: K.
Round 3: (K2tog, k1) twice. 4 stitches.
Round 4: (K2tog) twice. 2 stitches.
Break yarn and pull through stitches to fasten off.
FINISHING
Place the right (stockinette) sides of the shell top and bottom together. Using the thread from the BO edge of the shell bottom, whip stitch the shell top and bottom together around the outer edge. Leave a small 1-inch/2.5-cm opening for turning. Turn the shell right (stockinette) side out and stuff loosely with polyester fiberfill. Sew closed and set aside.
Attach 2 safety eyes to the turtle's head and stuff. Whip stitch the CO edge closed and weave in ends. If desired, make nostrils on the front of the head using French knots.
Whip stitch the CO edge closed on all flippers and the tail. Weave in all ends on the limbs.
Position the head, limbs, and tail around the underside of the shell, along the seam. They should be evenly spaced around the circular shell bottom. Pin them into place.
Using a piece of yarn in the same CC as the shell, sew around the shell between the seam and the purl edge on the shell top to create a ridge. As you sew around the body, sew through the pinned limbs, thus attaching them to the underside of the shell.
Remove pins and weave in any remaining ends. This completes one turtle. Repeat pattern two more times using different contrast colors for the shells of the remaining turtles.